Thank you for choosing the AMS Pendule 211/1 wall clock. This manual provides comprehensive instructions for the safe and efficient setup, operation, and maintenance of your new clock. Please read this manual thoroughly before use and retain it for future reference.
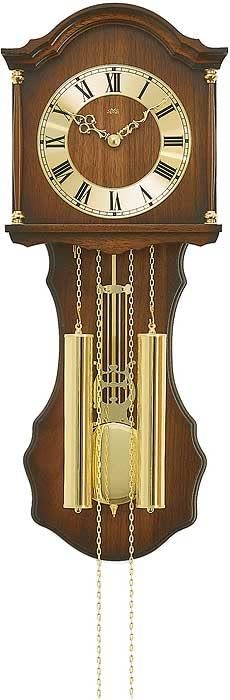
Figure 1: AMS Pendule 211/1 Wall Clock
2. Teeb tsa
2.1 Unpacking
Carefully remove the clock from its packaging.
Inspect the clock for any signs of damage. If damaged, do not proceed with setup and contact customer support.
Remove all protective films or packaging materials from the clock face, hands, and pendulum.
Khaws lub ntim rau yav tom ntej thauj lossis khaws cia.
2.2 Kev teeb tsa roj teeb
The AMS Pendule 211/1 requires batteries (not included) for operation. Please use the specified battery type.
Nrhiav lub roj teeb lub hau npog rau hauv qab ntawm lub moos.
Remove the cover by sliding or unlatching it.
Insert the required batteries (e.g., 1x AA or 1x C, refer to the compartment label for exact type) according to the polarity indicators (+ and -).
Hloov lub roj teeb lub hau npog kom ruaj ntseg.
2.3 Mounting Clock
Ensure the clock is mounted securely on a stable wall surface.
Choose a suitable location on a wall, away from direct sunlight, extreme temperatures, or vibrations.
Use an appropriate wall anchor and screw for your wall type (e.g., drywall, concrete). The mounting point should be strong enough to support the clock's weight.
Hang the clock securely using the keyhole slot on the back. Ensure it is level.
2.4 Teem sijhawm
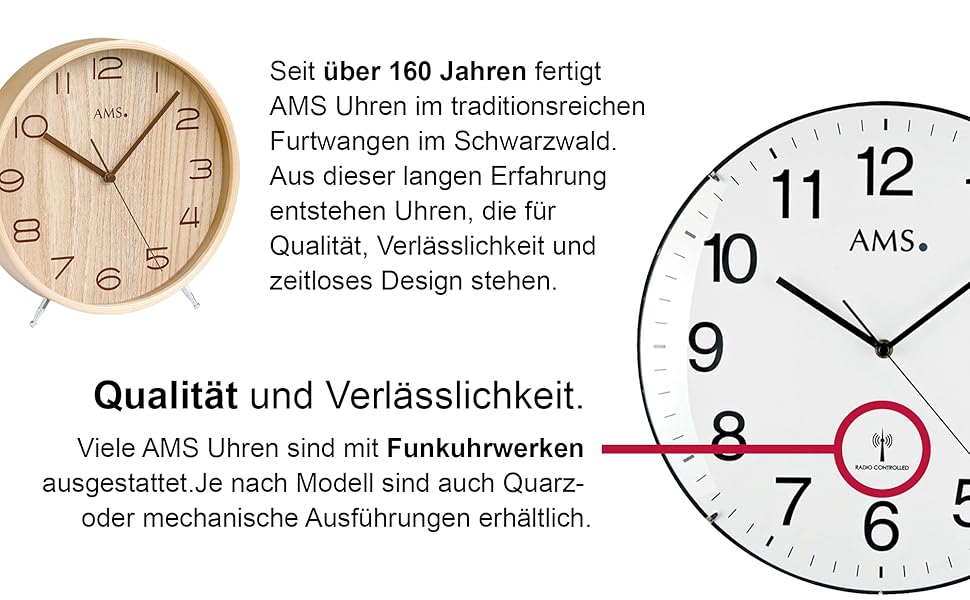
Your AMS Pendule 211/1 clock features an analog display. Some models may include a radio-controlled mechanism for automatic time synchronization.
Fig 2: Example Clock Face with Radio Controlled Symbol
Manual Setting: Locate the time-setting knob or wheel on the back of the clock. Gently turn this knob to move the minute and hour hands clockwise until the correct time is displayed. Avoid turning the hands counter-clockwise.
Radio-Controlled (if applicable): If your clock is radio-controlled, it will attempt to synchronize with a time signal after battery installation. Place the clock near a window for better signal reception. This process may take several minutes or hours. Once synchronized, the clock will automatically display the correct time.
2.5 Pendulum Setup
The pendulum is a decorative and functional element of your clock.
Carefully unpack the pendulum if it was separate from the main clock body.
Attach the pendulum to its hook or hanging mechanism inside the clock case. Ensure it hangs freely and does not touch the sides of the case.
Gently push the pendulum to one side to start its swing. It should swing evenly.
3. Cov lus qhia ua haujlwm
3.1 Nyeem Lub Sijhawm
The AMS Pendule 211/1 features a clear analog display with hour, minute, and second hands for precise timekeeping.
Cov short hand indicates the hour.
Cov long hand indicates the minute.
Cov thin sweeping hand indicates the second.
3.2 Tswb muaj nuj nqi
Your clock is equipped with an alarm function. Refer to the specific controls on the back or side of your clock for alarm setting.
Teem Tswb Sijhawm: Locate the alarm setting knob/dial (often separate from the main time setting). Turn it to set the desired alarm time.
Qhib lub tswb: Find the alarm ON/OFF switch or button. Move it to the "ON" position to activate the alarm.
Deactivate lub tswb: To turn off the alarm sound, move the alarm switch to the "OFF" position.
3.3 Pendulum Operation
Once the pendulum is installed and started, it should swing continuously. If it stops, gently restart it.
Ensure the clock is level on the wall to allow for an even pendulum swing.
Avoid obstructing the pendulum's movement.
4. Kev tu
4.1 Kev ntxuav
Regular cleaning will help maintain the appearance of your clock. The frame is made of Acrylonitrile Butadiene Styrene (ABS).
Wipe the clock's exterior with a soft, dry, lint-free cloth.
Rau cov cim tawv ncauj, me ntsis dampen daim ntaub nrog dej. Tsis txhob siv cov tshuaj hnyav, cov tshuaj ntxuav kom huv, lossis cov kuab tshuaj, vim tias cov no tuaj yeem ua rau qhov ua tiav.
Do not spray cleaning solutions directly onto the clock.
Keep the clock away from excessive dust and moisture.
4.2 Hloov roj teeb
Replace batteries when the clock starts losing time or stops functioning.
Follow the steps in Section 2.2 "Battery Installation" to replace old batteries with new ones of the correct type.
Pov tseg cov roj teeb uas siv los ua lub luag haujlwm raws li cov cai hauv zos.
5. Kev daws teeb meem
If you encounter issues with your AMS Pendule 211/1, refer to the table below for common problems and solutions.
Teeb meem
Ua Tau
Kev daws
Lub moos tsis khiav
Cov roj teeb tuag lossis tsis raug teeb tsa.
Xyuas seb lub roj teeb puas polarity; hloov cov roj teeb tshiab.
For further assistance, you may visit the official AMS website lossis hu rau lawv lub chaw pabcuam neeg siv khoom.
Ask a question about this manual
Ask about setup, troubleshooting, compatibility, parts, safety, or missing instructions. Manuals+ will review the question and use this page’s manual context to help answer it.