
1. Taw qhia
Thank you for choosing the Einhell TC-MS 2513 L Miter Saw. This precision tool is designed for cutting wood and coated panels with accuracy and efficiency. This manual provides essential information for the safe and effective operation, assembly, maintenance, and troubleshooting of your miter saw. Please read these instructions carefully before using the product for the first time and keep them for future reference.
1.1 Cov lus qhia txog kev nyab xeeb
- Ib txwm hnav cov cuab yeej tiv thaiv tus kheej tsim nyog (PPE), suav nrog tsom iav kev nyab xeeb, tiv thaiv kev hnov lus, thiab lub ntsej muag plua plav.
- Xyuas kom lub workpiece ruaj ntseg clamped ua ntej txiav.
- Khaws ob txhais tes ntawm qhov chaw txiav thiab tig cov hniav.
- Disconnect the power supply before making any adjustments, changing blades, or performing maintenance.
- Operate the saw in a well-lit and well-ventilated area.
- Tsis txhob siv cov saw hauv damp los yog ntub dej.
- Khaws cov menyuam yaus thiab cov neeg nyob deb ntawm qhov chaw ua haujlwm.
- Use only sharp, undamaged saw blades suitable for the material being cut.
2. Khoom Tshajview
The Einhell TC-MS 2513 L Miter Saw features a high-quality turntable for precise angle adjustments, a durable carbide-tipped saw blade for excellent cutting results, and a laser guide for accurate cuts. It also includes a dust collector for a cleaner workspace and auxiliary clamps for securing long workpieces.
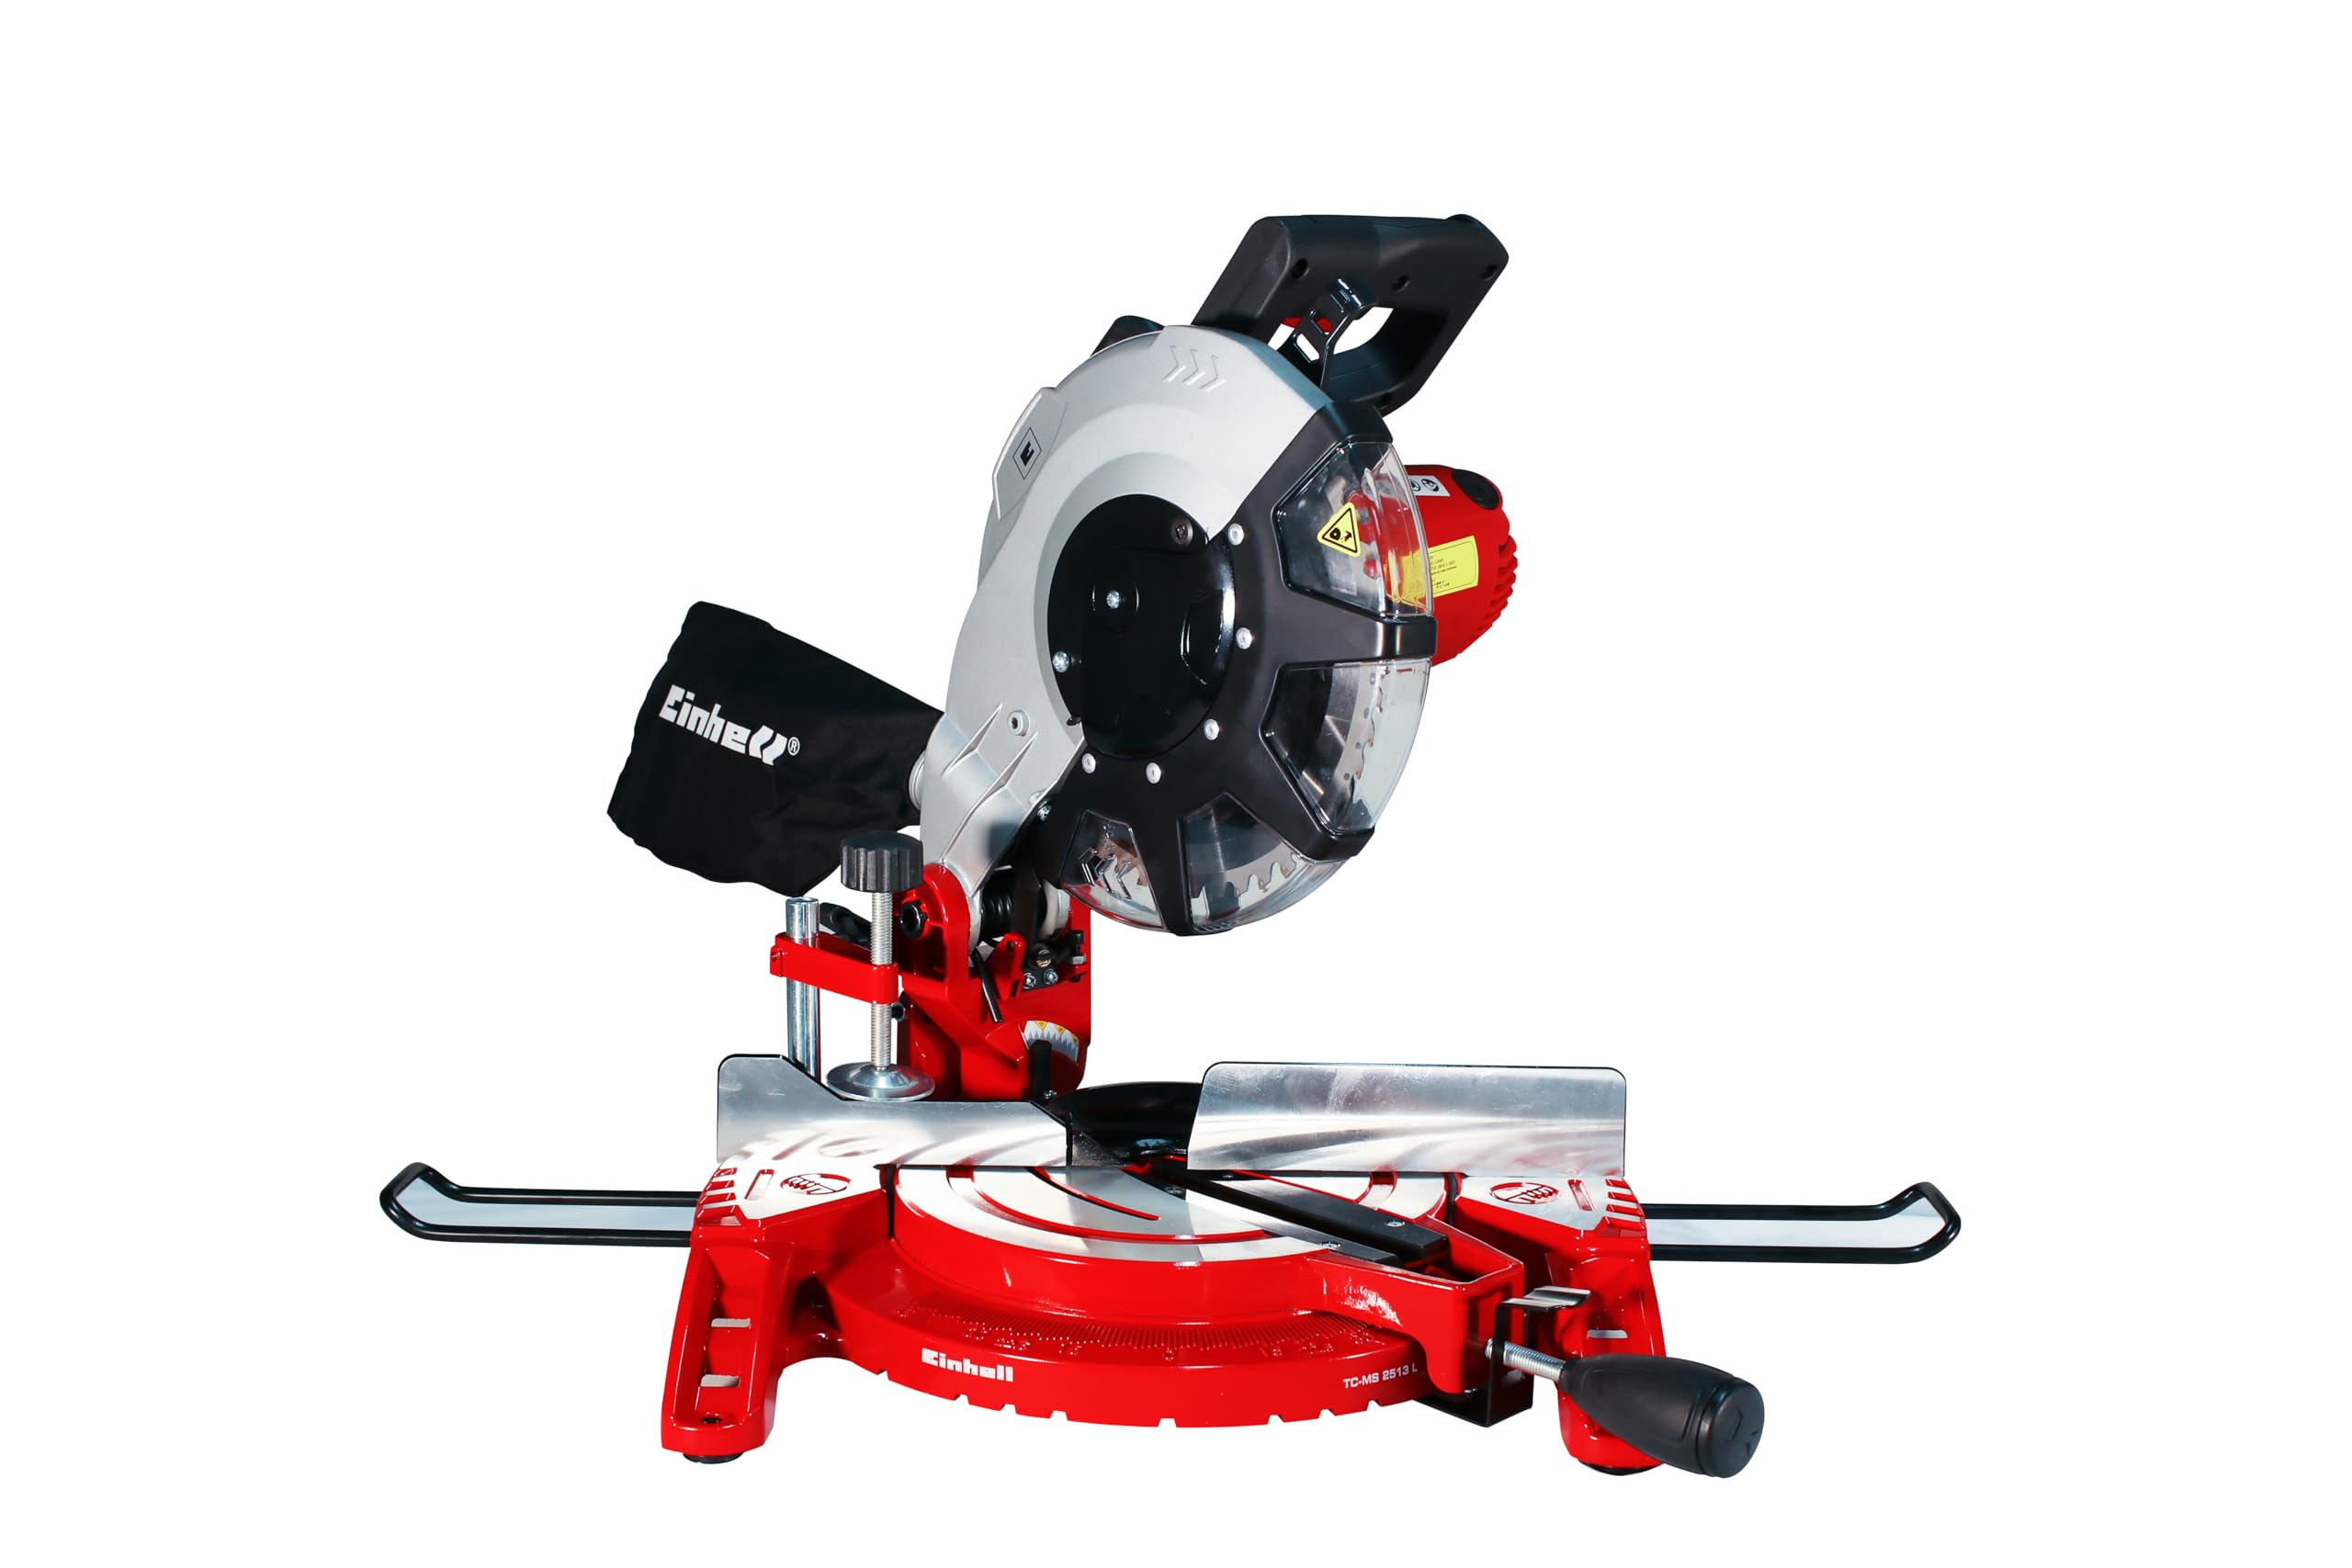
Daim duab 1: Pem hauv ntej view of the Einhell TC-MS 2513 L Miter Saw, showing the main components including the saw head, blade guard, turntable, and base.
2.1 Cheebtsam
- Saw Head with Motor and Blade Guard
- Handle with Power Switch
- Laser Guide
- Turntable with Angle Scale
- Base Phaj
- Workpiece Clamps (Auxiliary Grips)
- Plua plav Collection Bag
- Blade Locking Button
- Bevel Adjustment Lever
- Workpiece Txhawb nqa

Figure 2: Included accessories: workpiece supports, clamp, and dust collection bag.
3. Teeb tsa
3.1 Unpacking thiab Assembly
- Ua tib zoo tshem tag nrho cov khoom ntawm lub ntim.
- Ensure all parts listed in the manual are present and undamaged.
- Attach the workpiece supports to the base plate if not already installed.
- Mount the dust collection bag to the designated port.
3.2 Blade Installation (if not pre-installed)
- CEEB TOOM: Disconnect the saw from the power supply before installing or changing the blade.
- Press and hold the blade locking button to prevent the blade from rotating.
- Siv lub wrench muab los loosen cov hniav tuav cov ntsia hlau.
- Ua tib zoo tshem tawm lub flange sab nraud thiab cov hniav qub.
- Place the new carbide-tipped saw blade onto the spindle, ensuring the rotation direction arrow on the blade matches the arrow on the blade guard.
- Reattach the outer flange and tighten the retaining screw securely.
- Release the blade locking button.
3.3 Initial Adjustments
- Turntable Angle: Loosen the locking knob for the turntable. Rotate the turntable to the desired angle using the scale. Tighten the locking knob to secure the position. Pre-defined angles can be quickly selected.
- Bevel Lub kaum sab xis: Loosen the bevel adjustment lever. Tilt the saw head to the desired bevel angle. Secure the lever.
- Cov Lus Qhia Txog Laser: The integrated laser guide assists in precise cutting. Ensure it is clean and functional before use.
4. Cov lus qhia ua haujlwm
4.1 Kev ua haujlwm yooj yim
- Place the workpiece firmly against the fence and secure it with the workpiece clamp. For long workpieces, use the auxiliary supports.
- Adjust the miter and/or bevel angle as required for your cut.
- Lower the saw head slightly to align the laser line with your cut mark.
- Ensure the blade is not touching the workpiece before starting the motor.
- Press the power switch on the handle to start the motor. Allow the blade to reach full speed.
- Slowly and steadily lower the saw head through the workpiece. Do not force the cut.
- Once the cut is complete, release the power switch and allow the blade to stop completely before raising the saw head.
- Remove the cut workpiece.
4.2 Using the Laser Guide
The laser guide projects a line onto the workpiece, indicating the exact cutting path. Activate the laser by pressing its dedicated switch (if available, or it may activate with the main power). Align this line with your pencil mark for highly accurate cuts.
4.3 Plua plav Collection
The included dust collection bag helps to keep your workspace clean by collecting sawdust during operation. Regularly empty the dust bag to maintain optimal collection efficiency. For enhanced dust extraction, the saw can be connected to an external dust extractor system (adapter may be required).
5. Kev tu
5.1 Kev ntxuav
- Ib txwm txuas lub hwj huam txuas ua ntej ntxuav.
- Clean the saw regularly to remove sawdust and debris. Use a brush or compressed air.
- Tsis txhob siv cov tshuaj tua kab mob hnyav lossis cov kuab tshuaj.
- Empty the dust collection bag frequently.
- Keep the ventilation slots on the motor housing clear to prevent overheating.
5.2 Hniav Hloov
Refer to section 3.2 "Blade Installation" for detailed instructions on how to safely replace the saw blade. Always use sharp, undamaged blades of the correct size and type for your saw.
5.3 Lubrication
Periodically apply a small amount of machine oil to moving parts, such as the pivot points of the saw head and turntable, to ensure smooth operation. Avoid lubricating the blade or motor components.
6. Kev daws teeb meem
| Teeb meem | Ua Tau | Kev daws |
|---|---|---|
| Saw tsis pib | Tsis muaj fais fab mov; lub qhov hloov pauv tsis zoo; lub cev muaj zog overload. | Check power connection; ensure switch is fully engaged; allow motor to cool down. |
| Kev txiav tsis raug | Blade dull or damaged; incorrect angle setting; workpiece not secured. | Replace blade; re-adjust angles; secure workpiece firmly. |
| Kev vibration ntau dhau | Loose blade; damaged blade; loose mounting bolts. | Check blade tightness; replace damaged blade; tighten all mounting bolts. |
| Kev sau plua plav tsis zoo | Dust bag full; dust port clogged; improper connection. | Empty dust bag; clear dust port; ensure secure connection. |
If you encounter problems not listed here or if the suggested solutions do not resolve the issue, please contact Einhell customer support.
7. Cov lus qhia tshwj xeeb
| Feature | Tus nqi |
|---|---|
| Qauv | TC-MS 2513 L |
| Voltage | 220 Volts |
| Lub zog nkag | 1600 Watts |
| Tsis-Load Speed | 4000 RPM |
| Hniav Khoom | Carbide-tipped |
| Khoom Dimensions (L x W x H) | 54 x 39 x 40 cm |
| Qhov hnyav | 10 kg ib |
| Tshwj xeeb nta | Laser guide for cutting, Dust collector, Auxiliary grips |
| GTIN IB | 4006825609271 |
8. Warranty thiab Support
Einhell products are manufactured to high-quality standards and undergo strict quality controls. This product is covered by a manufacturer's warranty. Please refer to the warranty card included with your purchase or visit the official Einhell website rau cov ncauj lus kom ntxaws warranty thiab tej yam kev mob tshwj xeeb rau koj cheeb tsam.
For technical support, spare parts, or service inquiries, please contact your local Einhell service center or the retailer where you purchased the product.
Einhell Lub Tebchaws Yelemees AG
www.einhell.com