
1. Taw qhia
This manual provides instructions for the EEEkit OBD1 to OBD2 Adapter cable, designed to connect vehicles with a Toyota 22-pin diagnostic port to standard 16-pin OBD2 diagnostic scanners. This adapter facilitates communication between older Toyota vehicles and modern diagnostic tools, enabling vehicle fault diagnosis.

Image 1: EEEkit OBD1 to OBD2 Adapter cable, showing the 22-pin male connector and 16-pin female connector.
2. Khoom Nta
- Compatibility: Specifically designed for Toyota vehicles equipped with a 22-pin diagnostic socket, allowing connection to standard 16-pin OBD2 diagnostic tools.
- Yooj yim siv: Features a plug-and-play design for straightforward connection, converting the Toyota 22-pin interface to a standard OBD2 16-pin interface.
- Stable kis tau tus mob: Engineered for stable data transmission and effective anti-jamming, ensuring reliable communication with scanning software.
- Kev tsim kho ruaj khov: Manufactured with high-quality metal and PVC materials for long-lasting performance and durability.
- Txuj kev ua raws cai: Adheres to strict quality control standards and original specifications for consistent and reliable operation.

Image 2: Illustration of the adapter's compatibility with various Toyota vehicle models.

Duab 3: Paub meej view of the adapter highlighting its durable cable and anti-slip connector design.
3. Cov lus qhia tshwj xeeb
| Yam ntxwv | Paub meej |
|---|---|
| Hom | EEEKit |
| Qauv nab npawb | 124855 |
| Cov khoom txuas 1 | Toyota 22-Pin Male (OBD1) |
| Cov khoom txuas 2 | Standard 16-Pin Female (OBD2) |
| Cable Ntev | Kwv yees li 30 cm (11.81 nti) |
| Cov khoom siv tseem ceeb | High-quality copper |
| Khoom siv sab nrauv | PVC |
| Xim | Dub |
| Yam Nyhav | 3.2 hli |
| Khoom Dimensions | 1 x 1 x 6 inches (packaging/overall) |
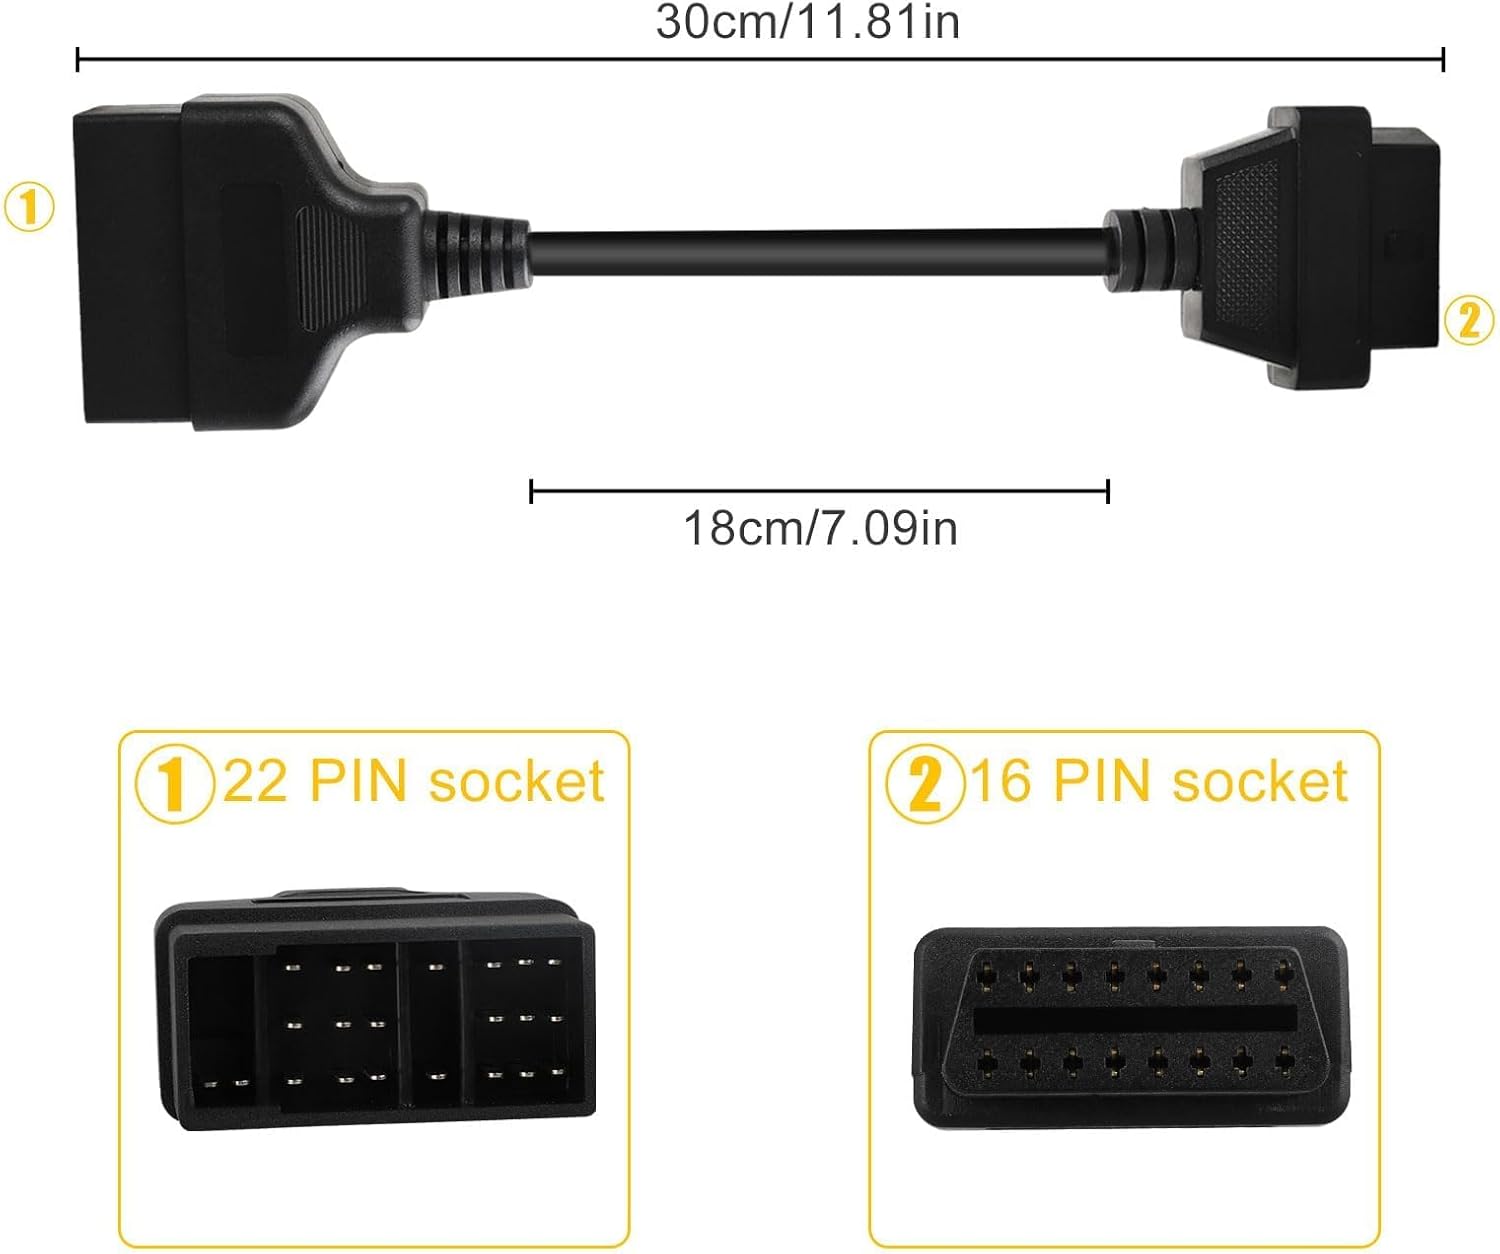
Image 4: Diagram illustrating the adapter's dimensions and connector types.
4. Kev teeb tsa thiab kev teeb tsa
The EEEkit OBD1 to OBD2 Adapter is designed for simple, non-destructive installation. Follow these steps to connect your diagnostic scanner to a compatible Toyota vehicle:
- Locate the Vehicle's Diagnostic Port: Identify the 22-pin diagnostic port in your Toyota vehicle. This port is typically located under the dashboard, near the steering column, or in the engine bay, depending on the vehicle model and year. Consult your vehicle's service manual if you have difficulty locating it.
- Connect the Adapter to the Vehicle: Plug the 22-pin male connector of the EEEkit adapter into the vehicle's 22-pin diagnostic port. Ensure a firm and secure connection.
- Connect the Diagnostic Scanner: Plug your standard 16-pin OBD2 diagnostic scanner into the 16-pin female connector of the EEEkit adapter.
- Power On and Initiate Scan: Turn on your diagnostic scanner. The scanner should now be able to establish communication with the vehicle's onboard computer system. Follow the instructions provided with your diagnostic scanner to perform scans, read codes, or access live data.
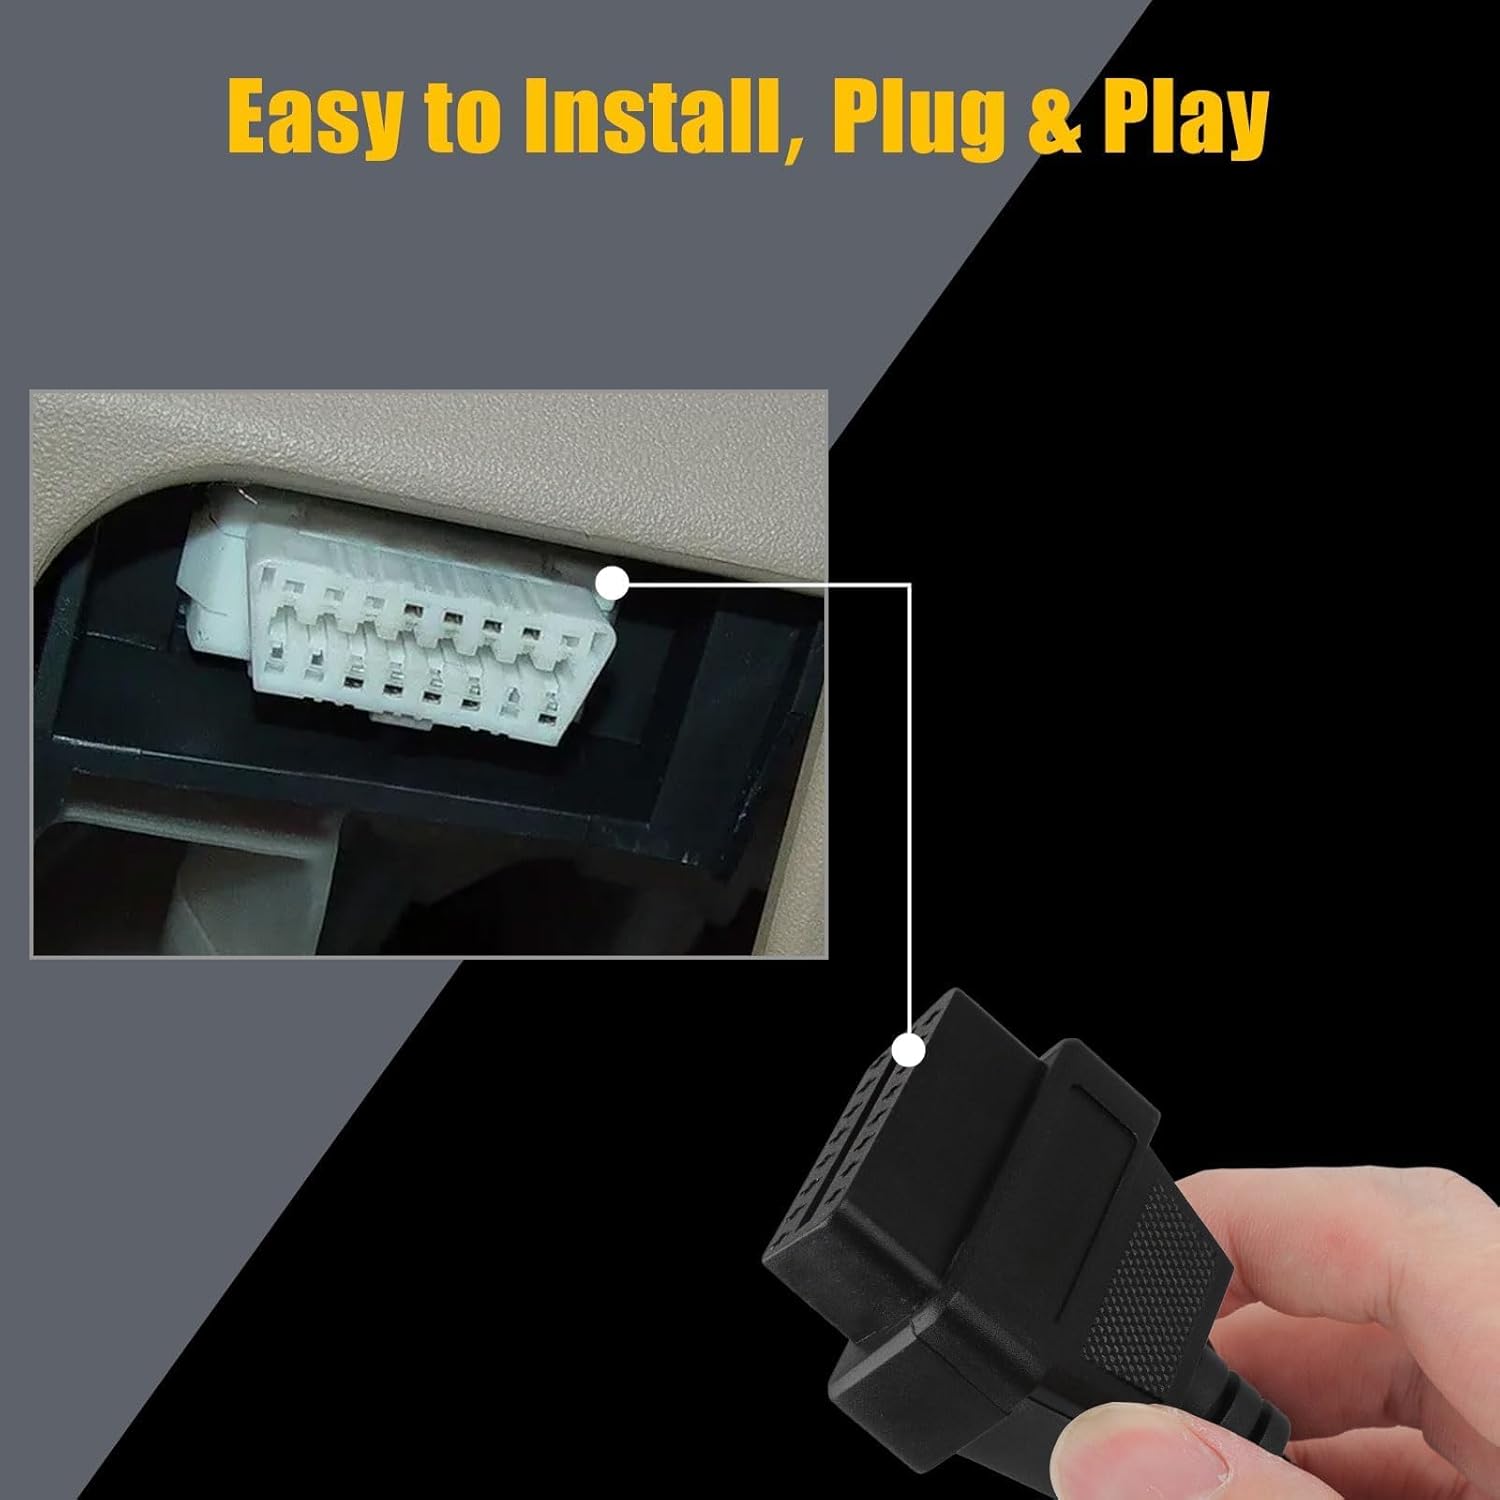
Image 5: Illustration of connecting the 16-pin end of the adapter to a diagnostic tool, demonstrating the plug-and-play installation.
Video 1: A seller-provided video demonstrating the physical connection of a Toyota 22-pin to 16-pin OBD2 diagnostic cable adapter. This video shows the physical appearance and connection points of the cable.
5. Cov lus qhia ua haujlwm
Once the adapter is securely connected to both your vehicle and the diagnostic scanner, operate your scanner as you normally would for an OBD2-compatible vehicle. The adapter acts as a pass-through, translating the older OBD1 Toyota protocol to the modern OBD2 standard for your scanner.
- Tsheb Ignition: Ensure the vehicle's ignition is in the "ON" position (engine off or running, as required by your specific diagnostic procedure).
- Scanner Functions: Use your diagnostic scanner to perform functions such as:
- Nyeem Cov lej teeb meem kuaj mob (DTCs)
- Clearing DTCs
- Viewing Live Data Streams
- Performing Readiness Monitor Tests
- Kev txhais cov ntaub ntawv: Refer to your diagnostic scanner's manual for interpreting codes and data. The adapter ensures the physical and electrical compatibility; the scanner handles the data interpretation.
6. Kev saib xyuas thiab tu
To ensure the longevity and reliable performance of your EEEkit OBD1 to OBD2 Adapter, follow these maintenance guidelines:
- Cia: Store the adapter in a clean, dry place away from direct sunlight and extreme temperatures.
- Ntxuav: If necessary, gently wipe the cable and connectors with a soft, dry cloth. Avoid using harsh chemicals or abrasive materials.
- Kev tuav: Always grasp the connectors when plugging or unplugging the cable. Avoid pulling directly on the cable itself to prevent damage to the internal wiring.
- Kev tshuaj xyuas: Periodically inspect the connectors and cable for any signs of wear, damage, or corrosion. Do not use the adapter if any damage is observed.
7. Kev daws teeb meem
If you encounter issues while using the EEEkit OBD1 to OBD2 Adapter, consider the following troubleshooting steps:
- No Communication with Scanner:
- Tshawb xyuas kev sib txuas: Ensure both the 22-pin and 16-pin connectors are fully and securely seated.
- Tsheb Compatibility: Verify that your vehicle indeed uses a Toyota 22-pin diagnostic port. This adapter is not universal for all OBD1 vehicles.
- Scanner muaj nuj nqi: Test your OBD2 scanner with a known OBD2-compatible vehicle to ensure it is functioning correctly.
- Tsheb Ignition: Confirm the vehicle's ignition is in the correct position (usually "ON" or "ACC" for diagnostics).
- Kev sib txuas sib txuas:
- Tshawb xyuas Connectors: Look for bent pins or debris in either the adapter's connectors or the vehicle's diagnostic port.
- Cable Integrity: Check the cable for any visible damage, kinks, or cuts.
- Incorrect Readings/Data:
- Scanner Settings: Ensure your diagnostic scanner is configured correctly for the vehicle type and year, if applicable.
- Software hloov tshiab: Verify that your diagnostic scanner's software is up to date.
If problems persist after attempting these steps, consult the user manual for your diagnostic scanner or contact EEEkit customer support for further assistance.
8. Warranty thiab Support
For information regarding product warranty, returns, or technical support, please refer to the EEEkit official website or contact their customer service directly. Details are typically available on the product packaging or the seller's online store page.
You can visit the EEEkit Store for more products and support: EEEkit Store on Amazon.