1. Taw qhia
The i-Star Portable DAB/DAB+/FM Radio offers a versatile listening experience with clear digital and analog radio reception. Designed for portability, it features a built-in rechargeable battery and a compact design, making it suitable for use at home or on the go. This manual provides essential information for setting up, operating, and maintaining your radio.

Daim duab 1: Pem hauv ntej view of the i-Star Portable DAB/DAB+/FM Radio, highlighting its compact design and user interface.
2. Teeb tsa
2.1 Unpacking thiab Initial Charge
- Carefully remove the radio and all accessories from the packaging.
- Connect the supplied USB charging cable to the radio's Micro USB port and to a compatible USB power adapter (not included) or a computer's USB port.
- Allow the radio to charge fully before first use. The charging indicator will typically change or turn off when charging is complete. A full charge provides up to 4 hours of playback.
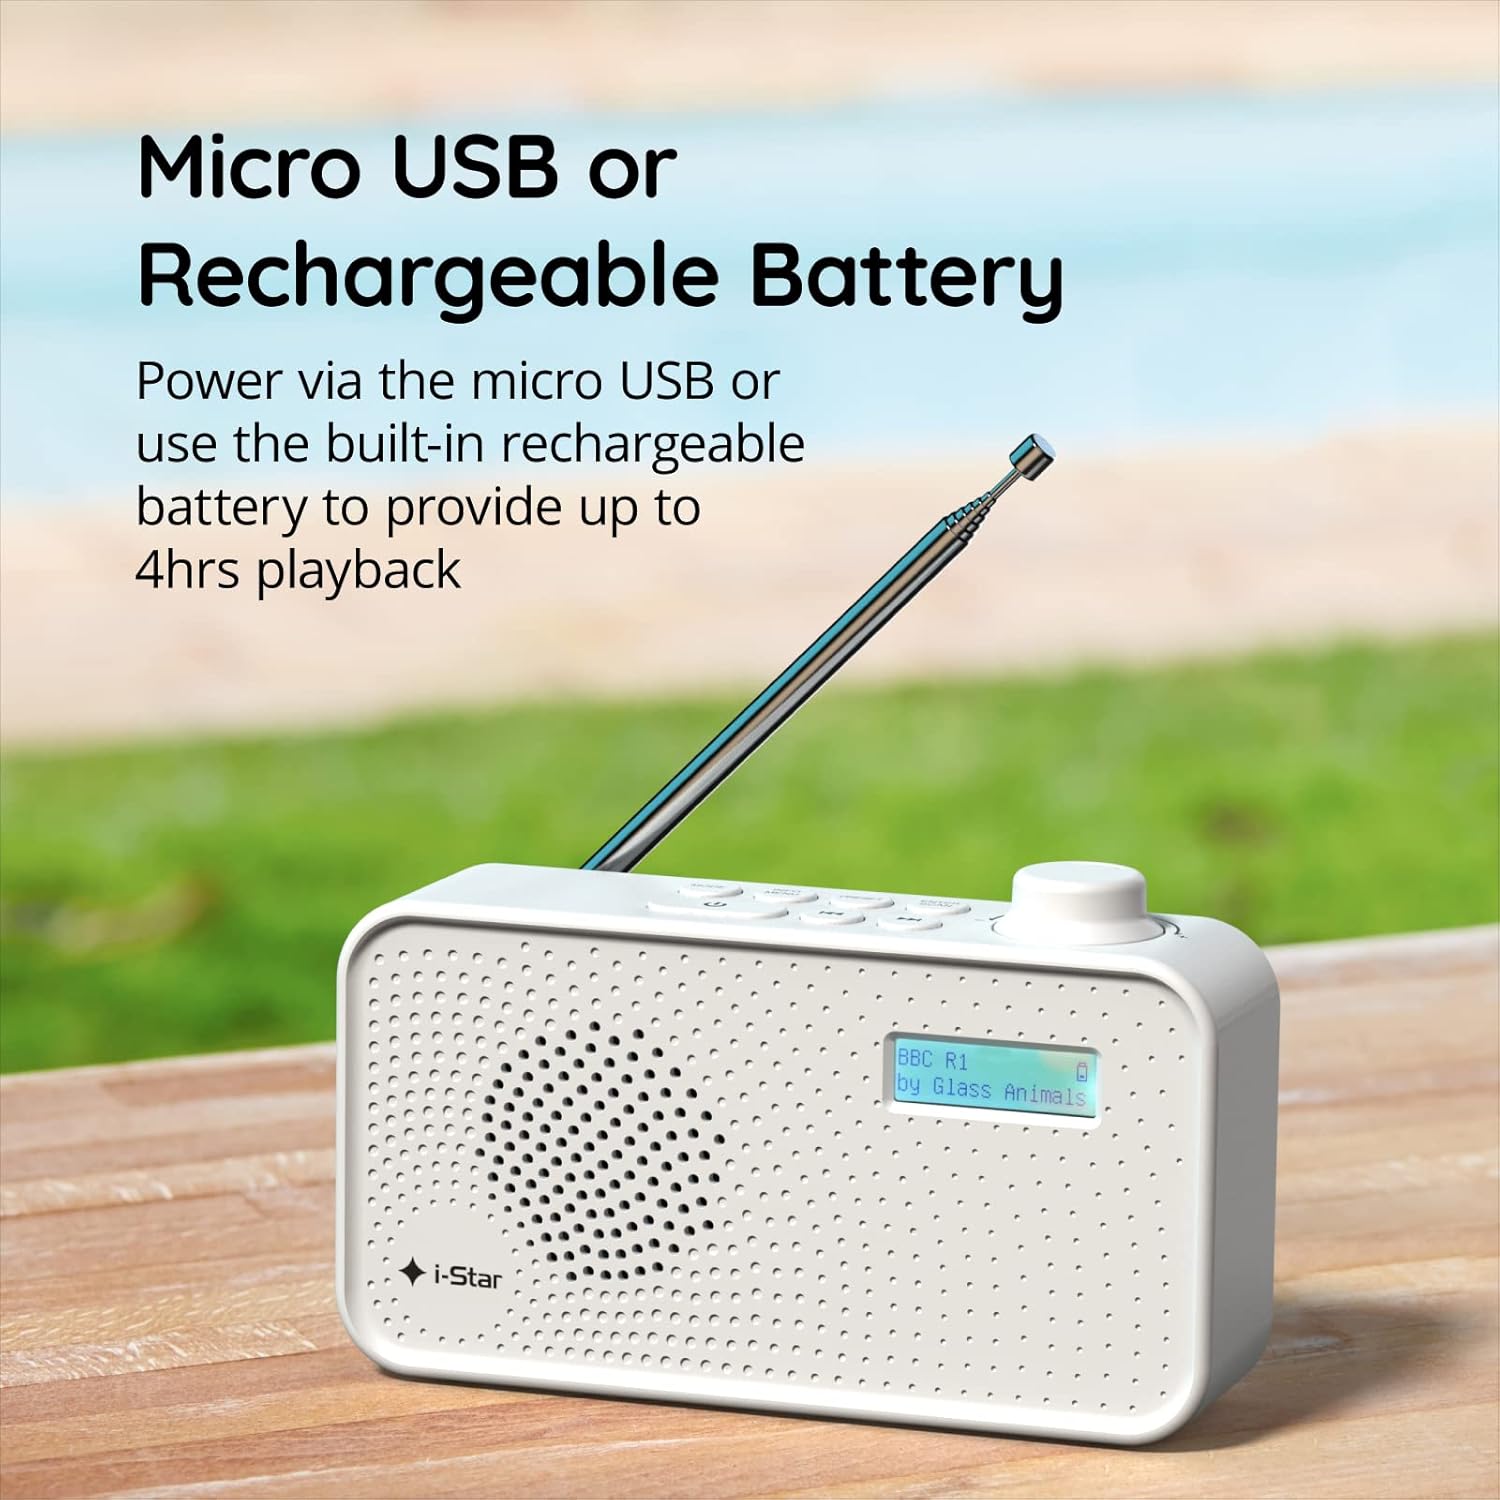
Daim duab 2: The radio powered via Micro USB or its built-in rechargeable battery.
2.2 First Power On and Automatic Scan
- Ntev lub telescopic antenna kom tag nrho rau kev txais tos zoo tshaj plaws.
- Nias thiab tuav lub TXHEEM khawm qhib lub xov tooj cua.
- Upon first power-on, the radio will automatically perform a scan for available DAB/DAB+ stations. This process may take a few minutes.
- Thaum qhov kev luam theej tiav lawm, lub xov tooj cua yuav tig mus rau thawj qhov chaw nres tsheb muaj.
3. Cov lus qhia ua haujlwm
3.1 Switching Between DAB/DAB+ and FM Modes
- Nias lub MODE button repeatedly to switch between DAB/DAB+ and FM radio modes. The current mode will be displayed on the LCD screen.

Daim duab 3: The radio supports DAB, DAB+, and FM for a wide range of listening options.
3.2 Qhov chaw nres tsheb
- Hom DAB/DAB+: Siv cov PRESET or TUNE buttons (left/right arrows) to navigate through the list of available stations. Press ENTER/SCAN xaiv qhov chaw nres tsheb.
- Hom FM: Nias lub ENTER/SCAN button to automatically scan for the next available FM station. Alternatively, use the TUNE buttons for manual fine-tuning.
3.3 Saving and Recalling Presets
- Hloov mus rau qhov chaw nres tsheb uas koj xav tau.
- Nias thiab tuav lub PRESET button until 'Preset Store' appears on the display.
- Siv cov TUNE khawm xaiv tus lej preset (1-60).
- Xovxwm ENTER/SCAN kom paub meej thiab txuag lub chaw nres tsheb.
- Yuav kom nco qab qhov chaw nres tsheb tau txais kev cawmdim, luv luv nias lub PRESET khawm, tom qab ntawd siv lub TUNE buttons to select the desired preset number, and press ENTER/SCAN.
3.4 Volume Control
- Tig lub VOLUME knob (located on the right side) clockwise to increase volume and counter-clockwise to decrease volume.
3.5 Pw tsaug zog Timer muaj nuj nqi
- To activate the sleep timer, press the COV NTAUB NTAWV / MENU button repeatedly until 'Sleep' appears.
- Siv cov TUNE buttons to select the desired sleep duration (e.g., 15, 30, 45, 60, 90 minutes).
- Xovxwm ENTER/SCAN to confirm. The radio will automatically turn off after the set time.

Daim duab 4: The sleep timer feature allows the radio to automatically switch off after a set period.
3.6 Headphone Listening
- Connect standard 3.5mm headphones (not included) to the headphone jack located on the side of the radio for private listening. The internal speaker will be muted automatically.

Daim duab 5: Connect headphones for personal listening without disturbing others.
4. Kev tu
4.1 Kev Saib Xyuas Ib Leeg
- Keep the radio away from direct sunlight, heat sources, and moisture.
- Tsis txhob muab lub xov tooj cua poob los yog ua rau muaj kev sib tsoo loj heev.
- Do not attempt to disassemble the radio; this will void the warranty.
4.2 Kev ntxuav
- So lub xov tooj cua sab nrauv nrog ib daim ntaub mos, qhuav.
- Tsis txhob siv cov tshuaj abrasive, waxes, lossis cov kuab tshuaj vim tias lawv tuaj yeem ua rau qhov ua tiav.
5. Kev daws teeb meem
- Tsis muaj zog: Ensure the radio is charged or connected to a power source via the USB cable. Check if the STANDBY button has been pressed.
- Tsis muaj suab: Check the volume level. Ensure headphones are not connected if you intend to use the speaker.
- Poor Reception (DAB/DAB+ or FM): Fully extend the telescopic antenna. Try repositioning the radio. Perform a full scan for DAB/DAB+ stations. In FM mode, try manual tuning.
- Radio Freezes/Unresponsive: Turn the radio off and on again. If the issue persists, allow the battery to fully discharge and then recharge it.
6. Cov lus qhia tshwj xeeb
| Feature | Specification |
|---|---|
| Hom | i-Lub Hnub Qub |
| Qauv nab npawb | 90059 XNUMX ib |
| Xim | Dawb |
| Xov tooj cua Bands txaus siab | DAB, DAB+, FM |
| Tuning Technology | Digital (DAB/DAB+), Analog (FM) |
| Kev sib txuas | USB (for charging), 3.5mm Headphone Jack |
| Hwj chim Source | Rechargeable Lithium-ion Battery (1200 mAh), USB Power |
| Roj teeb lub neej | Txog li 4 teev (ntawm ib qho nqi) |
| Tshwj xeeb nta | Portable, Sleep Timer, 60 Station Presets |
| Cov Cheebtsam suav nrog | USB Charging Cable, User Manual |
| Yam Nyhav | 440 Nws |
7. Warranty thiab Support
This product is covered by a standard manufacturer's warranty. Please refer to the warranty card included in your packaging for specific terms and conditions. For technical support, troubleshooting assistance, or warranty claims, please contact your retailer or the i-Star customer service department. Contact details can typically be found on the product packaging or the official i-Star webqhov chaw.