1. Taw qhia
The Jauarta MY8236B is a compact and reliable digital multimeter designed for accurate electrical measurements. It features a clear 4000-count display and a new generation layout for enhanced usability. This instrument is suitable for various applications including power electronic circuit measurement, new energy equipment testing, power system strength testing, automotive circuit maintenance, and educational purposes.
Ceeb toom kev nyab xeeb tseem ceeb: Always keep the inside of the meter clean and dry to prevent electric shock or damage to the meter. Read all safety warnings and operating instructions before using this instrument.
2. Khoom Nta
- Clear Display: Features a new display and function layout for improved readability.
- 4000 Counts Reading: Provides industrial-grade readings up to 4000 counts for precise measurements.
- Daim ntawv thov dav: Versatile for power electronics, new energy, automotive, and educational testing.
- Muaj tseeb thiab ntseeg tau: Designed for high reliability in electronic parameter detection.
- Kev tsim kho ruaj khov: Made from excellent ABS material, offering impact and scratch resistance.
3. Cov ntsiab lus ntawm pob
Thov xyuas cov ntsiab lus ntawm pob khoom thaum tau txais:
- 1 x Jauarta MY8236B Digital Multimeter
- 2 x Multimeter Test Leads (Liab thiab Dub)
- 1 x User Manual
4. Teeb tsa
4.1 Kev teeb tsa roj teeb
The Jauarta MY8236B multimeter requires two 1.5V AAA batteries (not included) for operation.
- Nrhiav lub hau roj teeb rau sab nraum qab ntawm lub multimeter.
- Siv lub hau ntswj kom tshem cov ntsia hlau uas khi lub hau roj teeb.
- Remove the cover and insert two 1.5V AAA batteries, observing the correct polarity (+ and -) as indicated inside the compartment.
- Hloov lub roj teeb npog thiab ceev cov ntsia hlau.
4.2 Kev Sib Txuas Cov Thawj Coj
Kev txuas cov xov hlau kuaj kom zoo yog qhov tseem ceeb rau kev ntsuas kom raug thiab muaj kev nyab xeeb.

Image: Close-up of the multimeter's input jacks. The black COM jack, the red VΩmA jack, and the red 10A jack are visible.
- Ntxig qhov kev xeem dub coj mus rau hauv lub COM (Common) jack.
- Rau feem ntau ntawm cov voltage, resistance, and small current measurements (up to 400mA), insert the red test lead into the V ΩmA jack.
- For high current measurements (up to 10A), insert the red test lead into the 10 A jack. Ensure the rotary switch is set to the appropriate 10A range.

Image: The Jauarta MY8236B Digital Multimeter shown with its red and black test leads properly connected to the input jacks.
5. Cov lus qhia ua haujlwm
5.1 Fais fab rau / tawm thiab xaiv muaj nuj nqi
To power on the multimeter, rotate the central rotary switch from the 'OFF' position to the desired measurement function. To power off, rotate the switch back to 'OFF'.
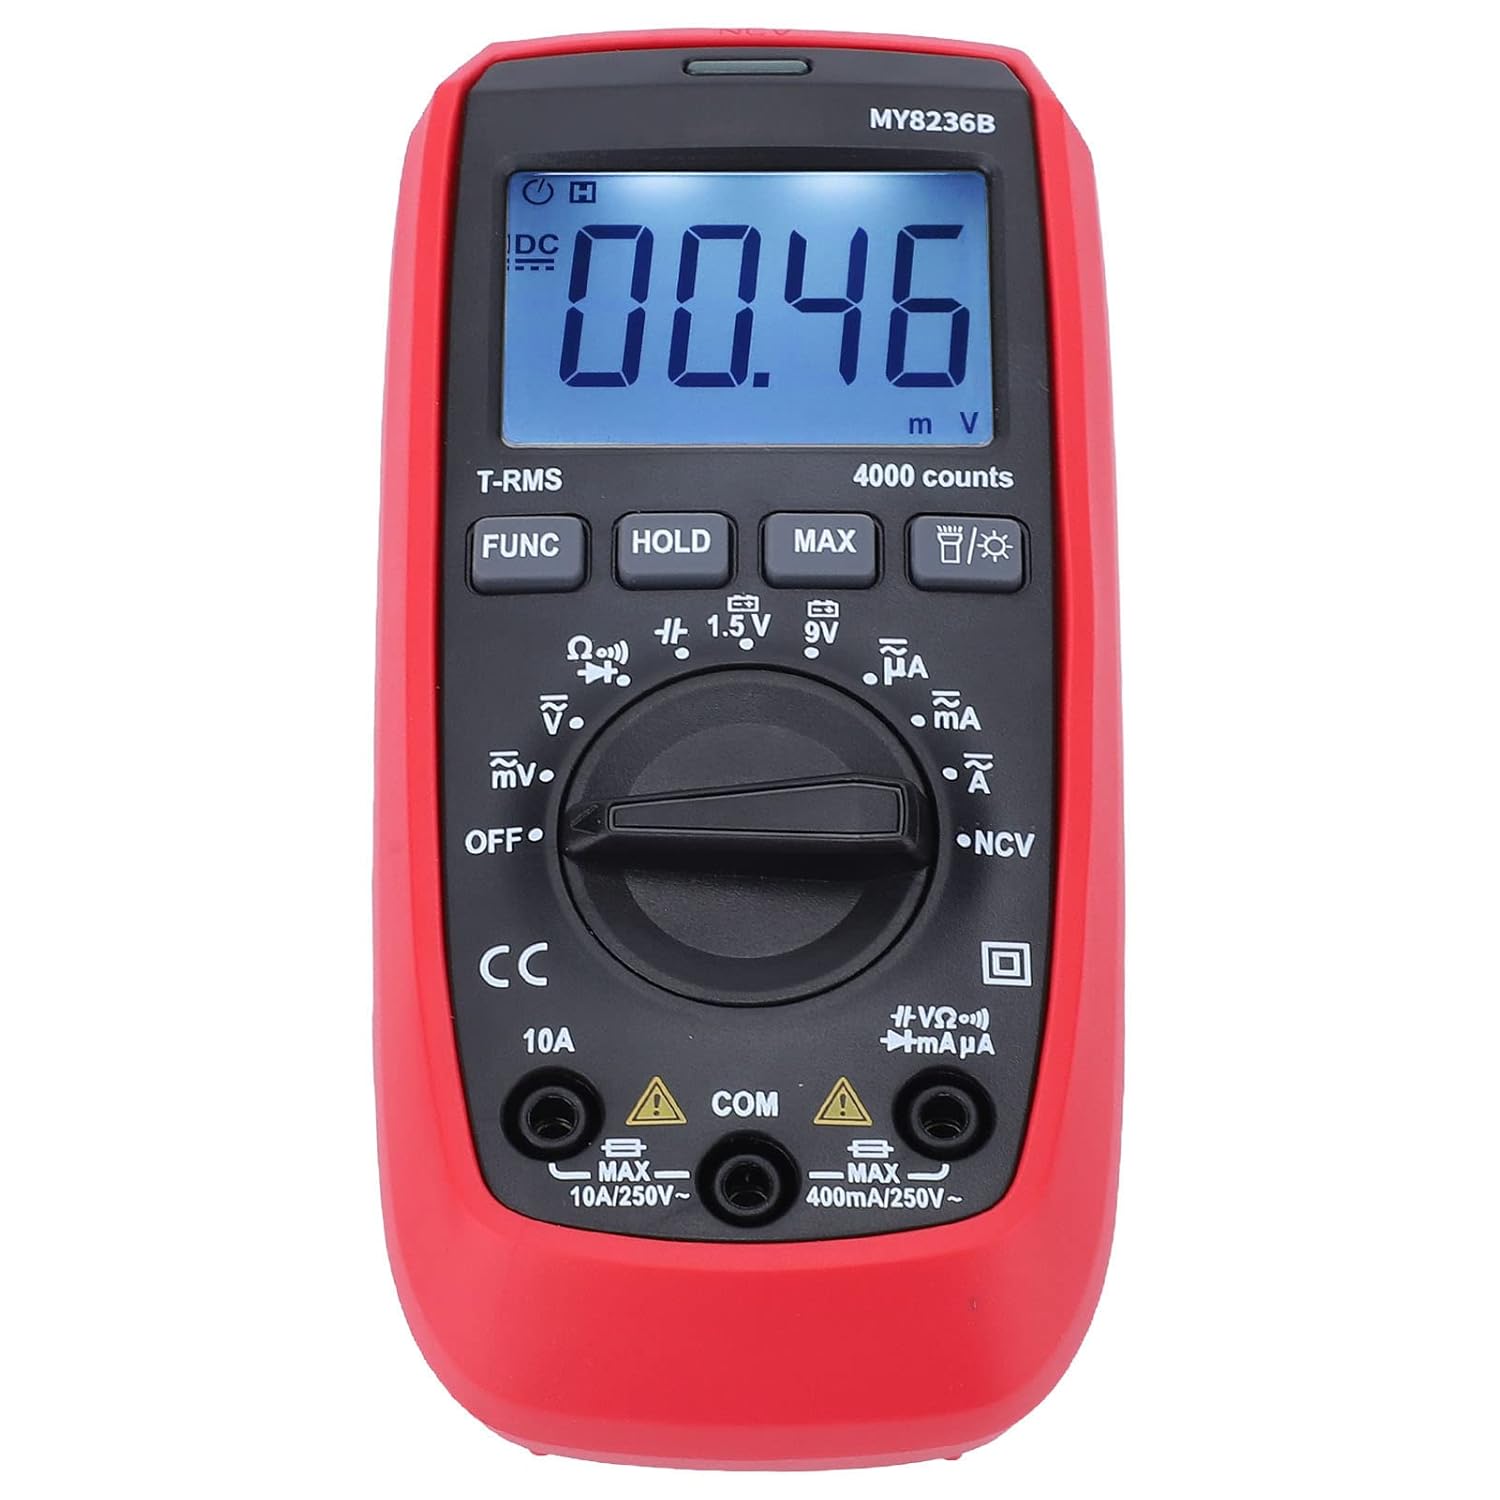
Duab: pem hauv ntej view of the Jauarta MY8236B Digital Multimeter, highlighting the central rotary switch for function selection and the digital display.
5.2 Ntsuas DC Voltage (V–)
- Set the rotary switch to the 'V–' range. Select an appropriate range (e.g., 4V, 40V, 400V) higher than the expected voltage. Yog voltage tsis paub, pib nrog qhov ntau tshaj plaws thiab txo qis raws li qhov xav tau.
- Txuas tus xaim liab rau sab zoo (+) ntawm lub voj voog thiab tus xaim dub rau sab tsis zoo (-).
- Nyeem voltage tus nqi ntawm cov zaub.
5.3 Ntsuas AC Voltage (V∼)
- Set the rotary switch to the 'V∼' range. Select an appropriate range higher than the expected voltage.
- Txuas cov xov hlau kuaj hla AC voltage qhov chaw.
- Nyeem voltage tus nqi ntawm cov zaub.
5.4 Measuring DC Current (A–)
Ceev faj: Tsis txhob txuas lub multimeter ua ke nrog lub voltage source when measuring current. Always connect it in series with the load. Ensure the correct input jack (VΩmA or 10A) is used.
- Tua lub zog rau lub voj voog.
- Break the circuit at the point where current is to be measured.
- Set the rotary switch to the 'A–' range (e.g., µA, mA, or 10A).
- Connect the red test lead to the appropriate current input jack (VΩmA for up to 400mA, 10A for up to 10A).
- Connect the multimeter in series with the circuit.
- Restore power to the circuit and read the current value.
5.5 Measuring AC Current (A∼)
Follow the same safety precautions and connection method as for DC current, but set the rotary switch to the 'A∼' range.
5.6 Kev Ntsuas Kev Tiv Thaiv (Ω)
Ceev faj: Ensure the circuit is de-energized before measuring resistance. Do not measure resistance on a live circuit.
- Turn off power to the circuit or component.
- Set the rotary switch to the 'Ω' range.
- Txuas cov xov hlau kuaj hla lub Cheebtsam lossis lub voj voog uas yuav ntsuas.
- Nyeem thev hauj tus nqi ntawm cov zaub.
5.7 Kev Ua Haujlwm Tshwj Xeeb
- Khawm FUNC: Used to switch between different functions within a single rotary switch position (e.g., AC/DC, Diode/Continuity).
- HOLD khawm: Kho qhov nyeem tam sim no ntawm qhov screen. Nias dua kom tso tawm.
- MAX khawm: Displays the maximum measured value.
- Backlight khawm: Activates or deactivates the display backlight for better visibility in low-light conditions.
6. Kev tu
6.1 Kev ntxuav
To maintain accuracy and prevent damage, keep the multimeter clean and dry. Wipe the case with a damp cloth and mild detergent. Do not use abrasives or solvents. Ensure no moisture enters the meter.
6.2 Hloov roj teeb
When the battery indicator appears on the display, replace the batteries promptly to ensure accurate readings. Refer to Section 4.1 for battery installation instructions.
6.3 Cia khoom
If the multimeter is not used for an extended period, remove the batteries to prevent leakage and damage. Store the instrument in a cool, dry place away from direct sunlight and extreme temperatures.
7. Kev daws teeb meem
- Tsis muaj zaub: Check if the batteries are correctly installed and have sufficient charge. Replace batteries if necessary. Ensure the rotary switch is not in the 'OFF' position.
- Kev nyeem tsis raug: Verify that the test leads are properly connected to the correct input jacks and that the rotary switch is set to the appropriate function and range. Ensure the circuit is de-energized for resistance measurements.
- No Reading for Current: Check if the fuse is blown. If measuring high current, ensure the red lead is in the 10A jack.
- Display Shows 'OL' (Overload): The measured value exceeds the selected range. Switch to a higher range or ensure the input is within the meter's maximum specifications.
8. Cov lus qhia tshwj xeeb
| Parameter | Ntau yam |
|---|---|
| DC Voltage | 400V, 4V, 40V, 400V, 600V |
| AC Voltage | 400V, 4V, 40V, 400V, 600V |
| DC tam sim no | 400µA, 4000µA, 40mA, 400mA, 10A |
| AC Tam Sim No | 400µA, 4000µA, 40mA, 400mA, 10A |
| Kev tiv thaiv | 400Ω, 4kΩ, 40kΩ, 400kΩ, 4MΩ, 40MΩ |
| Cov lej Xam Pom | 4000 suav |
| Hom roj teeb | 2 x 1.5V AAA roj teeb |
| Khoom siv | ABS |
| Yam Nyhav | 323 g ib |
| Parcel Dimensions | 16 x 11 x 5 cm |
9. Cov ntaub ntawv kev nyab xeeb
- Always inspect the multimeter and test leads for any damage before use. Do not use if damaged.
- Tsis thov voltage or current that exceeds the maximum rated input for any range.
- Siv ceev faj thaum ua haujlwm nrog voltages saum toj no 30V AC RMS, 42V ncov, los yog 60V DC. Ces voltages ua rau poob siab.
- Ib txwm tshem cov xov hlau sim ntawm lub voj voog ua ntej hloov cov haujlwm lossis ntau yam.
- Tsis txhob siv lub ntsuas ntsuas hauv qhov chaw tawg, vapor, lossis plua plav.
- Ensure your hands are dry when operating the meter.
10. Warranty thiab Support
For warranty information or technical support, please refer to the documentation provided with your purchase or contact Jauarta customer service through your retailer. Keep your purchase receipt as proof of purchase.