Taw qhia
This manual provides detailed instructions for the installation, operation, and maintenance of your CAMECHO 4+64GB Android 15 Car Stereo. Please read this manual thoroughly before installation and use to ensure proper function and to maximize your experience with the device. Keep this manual for future reference.
Tsheb Compatibility
This car stereo is specifically designed for the following vehicle models:
- Chevrolet Silverado 1500 (2014-2018)
- Chevrolet Silverado 2500 (2014-2018)
- Chevrolet Silverado 2500 HD (2014-2018)
- Chevrolet Silverado 3500 (2015-2018)
- Chevrolet Silverado 3500 HD (2014-2018)
- GMC Sierra (2014-2018)
- GMC Sierra 1500 (2014-2018)
- GMC Sierra 2500 HD (2014-2018)
- GMC Sierra 3500 HD (2014-2018)
Lus Cim Tseem Ceeb: Qhov no unit yog tsis sib haum with vehicles equipped with an original Bose Audio System or an optical fiber power cable (power cable with only 2 cables).

Daim ntawv teev npe
Before proceeding with installation, please verify that all components are present in the package:
- 1 x Android Head Unit
- 1 x AHD Lub Koob Yees Duab thaub qab
- 1 x Sab Nraud Microphone
- 1 x Lub Horn Me Me
- 1 x Astern Adapter Cable
- 2 x Direction Control Adapter Cable
- 1 x Cov Cuab Yeej Siv Nruab
- 1 x Phau Ntawv Qhia
- 1 x Dupont Wire
- 2 x USB Cable
- 1 x Original USB Cable
- 1 x Lub Koob Yees Duab Tom Qab Cable
- 1 x Protocol Box
- 1 x GPS Antenna
- 1 x Xov Tooj Cua Antenna
- 1 x Fais fab Cable
- 1 x RCA Cable
Kev teeb tsa thiab kev teeb tsa
Before beginning the installation, ensure the vehicle's power is disconnected to prevent electrical damage. It is recommended to prepare tools such as a plastic pry tool and a screwdriver.
Disassembly of Original Radio
- Use a pry bar to carefully open the outer frame of the original car radio.
- Use a screwdriver to unscrew the four screws securing the original radio.
- Gently pull out the wires connected to the original car radio.
- Use a pry bar to open the air-conditioning button board on the original car radio panel.
- Unscrew the two screws fixing the left and right sides of the CD player.
- Pull out the wires connected to the original CD player.
- Unplug the cable connecting the host to the original car, then remove the host unit.
New Radio Installation
- Connect the wiring harness and protocol box of the new radio. If the wiring harness does not match, contact customer service for the correct wiring harness.
- Install the air-conditioning button panel to the new radio panel.
- Install the new radio, tightening the four fixing screws on the left and right sides.
- Install the radio frame.

Kev Txuas Txuas Txuas
Ensure all cables are securely connected as per the diagrams below.
CANBUS Box Connection
Confirm that the CANBUS box is connected. After connecting, you may need to set the protocol correctly for steering wheel controls to function. Navigate to Car Settings > Factory (Password: 1234) > CarType Setting, ces xaiv Xinput - Chevrolet - Silverado - 2012-2019 rau koj lub tsheb.

Reversing Camera Installation
The reversing input must be plugged in even if a reversing camera is not used.
- Connect the positive pole of the power supply of the car's reversing light.
- Connect to the negative pole of the power supply of the car's reversing light.
- The reversing trigger is controlled by the stereo and does not require a separate connection.
After wiring, set the camera resolution via Settings > Factory Setup (Password: 1234) > Backcar Source Settings. Select the camera resolution and restart your car.

Original Backup Camera Connection
If you are using an original backup camera, connect the yellow AV connector ("CAM Video In") of the power cable to the Reversing Input cable.
Then set the camera resolution via Settings > Factory Setup (Password: 1234) > Backcar Source Settings. Select the camera resolution and restart your car.

Cov lus qhia ua haujlwm
Tus neeg siv interface thiab zaub
The unit features a 10-inch in-cell 1280*720P HD capacitive touchscreen. You can customize the home page by selecting the applications you wish to display.

Wireless Carplay & Android Auto
The stereo supports wireless Apple Carplay and Android Auto, allowing access to phone calls, messages, navigation, and music directly from the touchscreen. Hands-free communication is supported via Siri/Google assistants.
Connecting Wireless Apple Carplay
- Connect the car radio's Bluetooth (Bluetooth name: "Car BT0", Bluetooth PIN: 1234). Ensure "phone audio, music audio" is successfully connected.
- Click "SpeedPlay".
- Allow Contacts and Favorites Sync. Allow "Use CarPlay with SpeedPlay".
- Wait for connection. The first connection may take longer.

Connecting Wireless Android Auto
- Click "SpeedPlay".
- Connect your phone into the rear 4-pin USB port with the original data cable.
- Allow "USB debugging" on your phone.
- Wait for connection. The first connection may take longer.

GPS Navigation & WiFi Connectivity
The unit includes a built-in WiFi/Hotspot module, allowing you to download various applications like Google Maps, Waze, Spotify, YouTube, and Netflix. You can surf the internet and access online maps. For offline navigation, download maps within the Here WEGO app.

Bluetooth & FM RDS Tuner
Support Bluetooth 5.0 for hands-free calling and wireless music streaming from your phone (e.g., Spotify, Pandora). The built-in FM RDS Radio provides access to music, news, and sports with 18 preset stations.

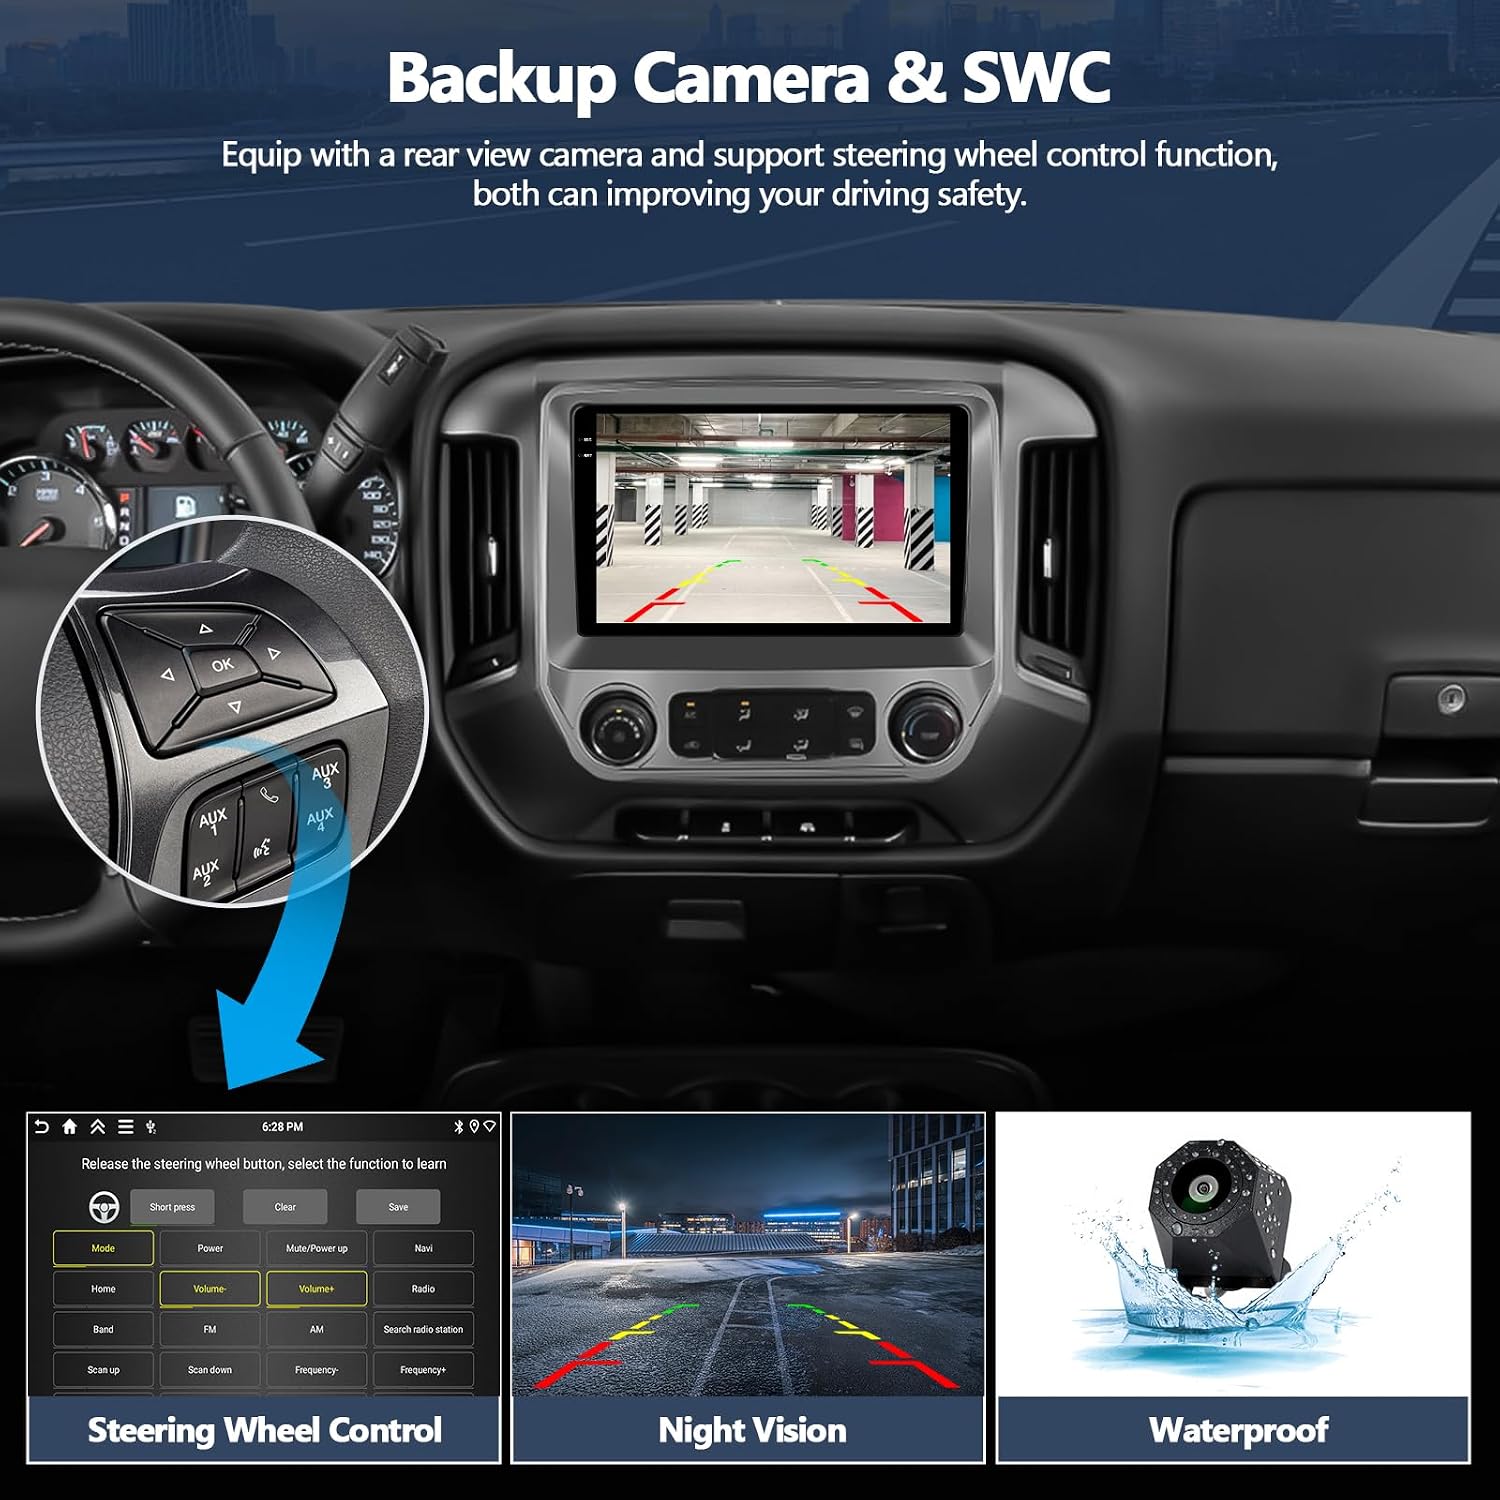
Kev Tswj Xyuas Lub Rooj Tsav Tsheb (SWC)
The unit is compatible with original steering wheel control buttons. After connecting the CANBUS box and setting the protocol (as described in the Setup section), you can configure the buttons to control various functions of the stereo.

Split Screen Functionality
The split-screen feature allows two applications to run simultaneously, enhancing multitasking capabilities. For example, you can use navigation on one side and music playback on the other.

iOS/Android Mirror Link
Synchronize your smartphone screen to the car radio display. Android devices support two-way operation, while iOS devices support one-way operation (display only).

Kev tu
To ensure the longevity and optimal performance of your car stereo, follow these general maintenance guidelines:
- Ntxuav: Siv daim ntaub mos mos thiab qhuav los ntxuav lub vijtsam thiab sab nraud. Tsis txhob siv cov tshuaj ntxuav uas ua rau puas tsuaj rau saum npoo.
- Software hloov tshiab: Periodically check for available software updates to ensure you have the latest features and bug fixes. Updates can typically be found through the system settings or the manufacturer's webqhov chaw.
- Ib puag ncig tej yam kev mob: Tsis txhob tso lub tsev mus rau qhov kub thiab txias, ncaj qha tshav ntuj rau lub sijhawm ntev, lossis dej noo ntau dhau.
Kev daws teeb meem
This section addresses common issues you might encounter with your CAMECHO car stereo.
Tsis muaj suab tso zis
If you experience no sound from the stereo:
- Connect the Small Horn to the power harness.
- Connect the AUX IN R/L (or AUDIO OUT R/L) from the RCA cable to AUX IN R/L from the Power harness.
- Open the "Car Amplifier" application on the drag-down page of the top bar.
- For external power amplifiers, connect the power cable of the amplifier to the ACC cable of the Power harness.

Backup Camera Not Working
If the backup camera is not displaying an image:
- Verify all camera wiring connections as per the installation section.
- Ensure the reversing input cable is correctly connected to the main device. The white plug must be connected to the main device for Bluetooth and WiFi signals.
- Check camera settings: Go to Settings > Factory Setup (Password: 1234) > Backcar Source Settings and ensure the correct camera resolution is selected. Restart the car after making changes.
Unit Freezes or Cannot Play Videos
If the unit freezes or experiences issues playing videos:
- Restart the unit: Turn off the vehicle, wait a few minutes, and then restart.
- Check storage: Xyuas kom muaj qhov chaw cia dawb txaus ntawm lub cuab yeej.
- Software hloov tshiab: Verify if any system updates are available and install them.
- Hoobkas pib dua: As a last resort, perform a factory reset (note: this will erase all user data and settings). Consult the system settings for this option.
Specifications
| Khoom Dimensions | 31.8L x 5W x 26H cm |
| Kev Ua Haujlwm | Hauv 15 |
| Nco | 4GB RAM + 64GB ROM |
| Qhov Loj | 10 Nws |
| Screen daws teeb meem | 1280 x 720P HD |
| Kov Screen Hom | Capacitive |
| Kev sib txuas wireless | Wireless Carplay, Android Auto, WiFi, Bluetooth 5.0 |
| Kev taw qhia | GPS (Worldwide Map Type) |
| Xov tooj cua Tuner | FM RDS Radio |
| Compatible Devices | Smartphone |
| Chaw tsim tshuaj paus | CAMECHO |
| Lub Tebchaws Keeb Kwm | Tuam Tshoj |
Warranty Information
This CAMECHO car stereo comes with a 1-Xyoo Warranty txij hnub ntawm kev yuav khoom. Qhov kev lees paub no suav nrog kev tsim khoom tsis raug thiab ua haujlwm tsis zoo raws li kev siv ib txwm. Thov khaws koj cov ntaub ntawv pov thawj ntawm kev yuav khoom rau kev lees paub.
Kev Pab Txhawb Cov Neeg Siv Khoom
For technical assistance, troubleshooting, or any inquiries regarding your CAMECHO car stereo, please contact our customer support team:
- Email: yanningqiu2021@163.com
- Hloov Email: CAMECHOVIP@126.com
Our support team is available to provide assistance and guidance.
